Friday, November 12, 2010

Simple Placemats and Coasters

I'm still working here and there on a few things for Connie's bazaar next weekend. If you're in the area, this is a wonderful bazaar and Connie's booth is always packed with shoppers because she is so talented and makes the greatest things. This year I'm trying not to buy any supplies, but use what I already have. If you've been in a bazaar before, you know that if you put too much time and money into your crafts, you won't recover your costs or time. So like these placemats, I kept them simple. I used two coordinating fat quarters to make a set, plus the backing fabric.
A few more, I made 12 total, I'm going to sell them in sets of two.

Then, I couldn't waste the scraps, so I made some coasters. As I was making these, I thought coasters would be a great Christmas gift for a school teacher. I have the perfect scraps to use too.

I have something else I'm working on that I will be sharing soon. I may need to go to the store and buy a few supplies to finish them up though...that's okay, they'll be worth it!

Thursday, November 4, 2010

My Living Room


Please come into our front room, the living room. But keep in mind it is a work in progress. I'll try to show you our house room by room as I get things a little more organized.


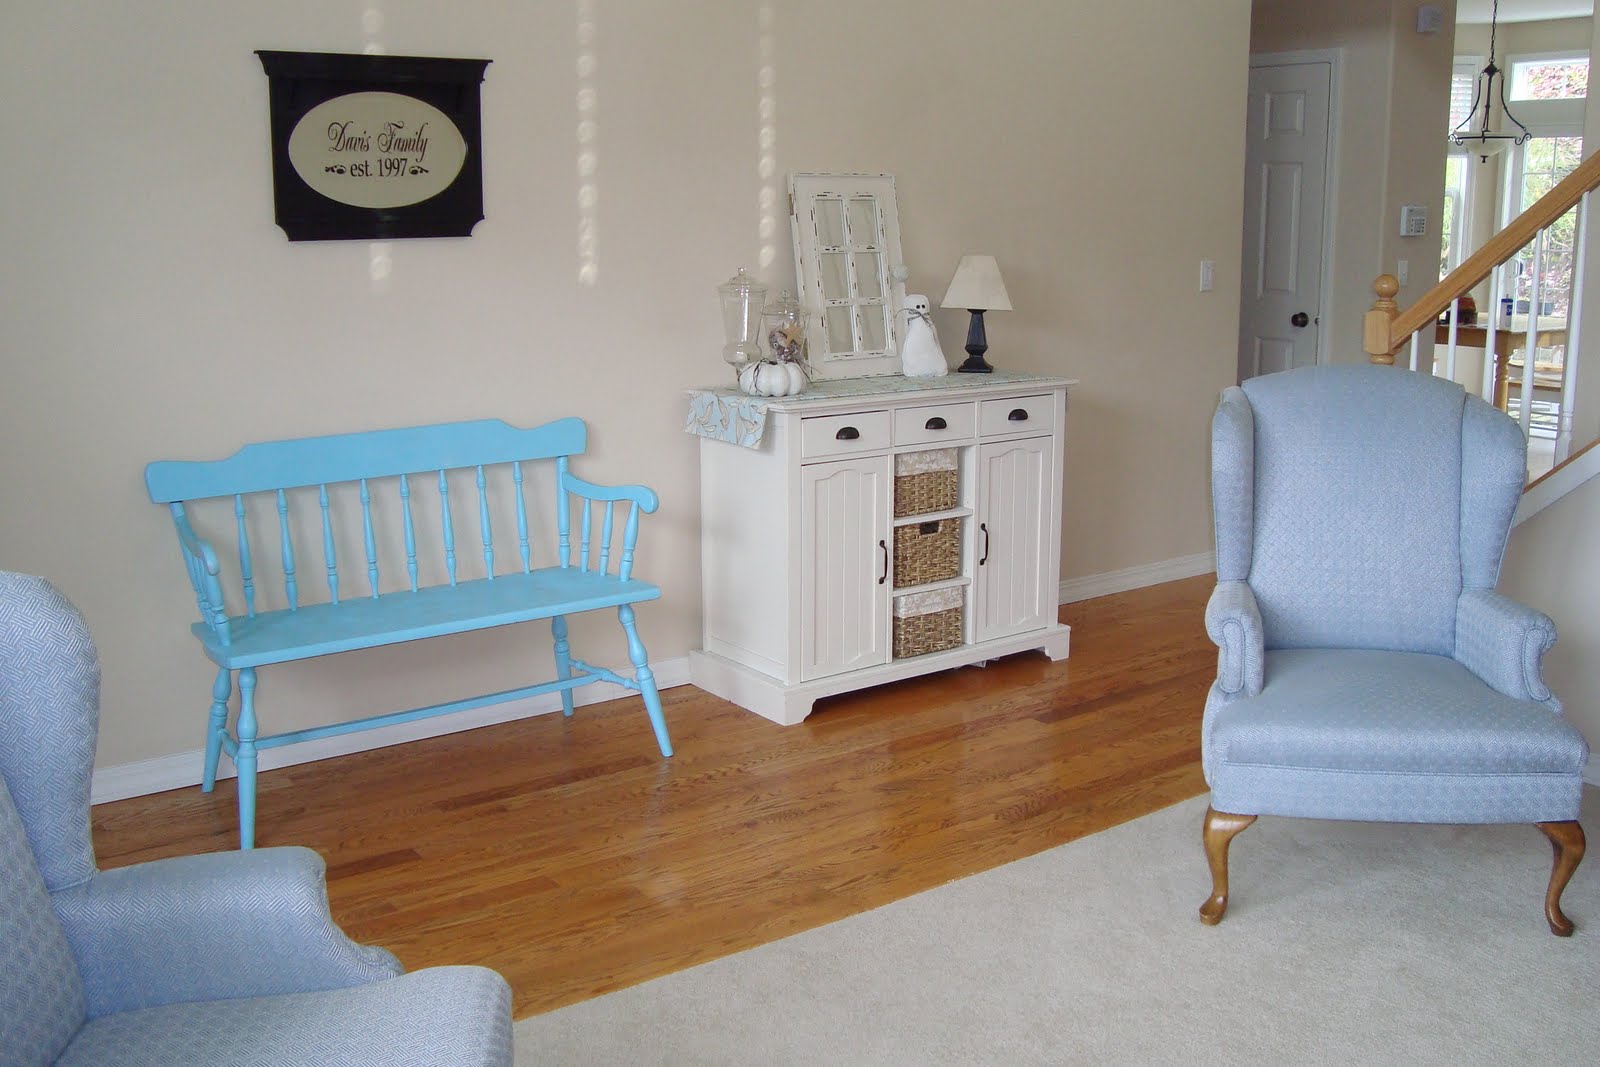
When you first come in this is what you see (above). I love the openness of the room: high ceilings, open staircase, and windows to let light in.

A view from the staircase.

The foyer area.

I love this console I bought a few years ago at a garage sale for $40. I finally found some baskets at TJ Maxx that fit perfectly.

I just love Craigslist! I didn't have any formal living room furniture, so I started to shop Craigslist. I bought these wingback chairs on Craigslist for $100, for the pair. They are in great condition and I'm actually really liking the blue upholstery.

Another Craigslist find, $50. So my new-to-me formal living room furniture cost me a total of $150, not too bad. Okay, now on this settee I'm not fond of the floral fabric, but that will be changing soon. I'm going to try to reupholster it myself. This will be my first upholstery project, so wish me luck. I brought home four fabric samples from JoAnn's. I'm going to go with a light neutral color so I can brighten it up with fun pillows.


This is the upholstery I will be using, it's called Crypton. It's not cheap, but it's 50% off at JoAnn's and I have a 20% off coupon for the total cost. It's perfect for families since it is extremely durable, stain resistant, etc. I've read where people have been able to easily wash off dirt, chocolate, ketchup, and more. It's also soft and looks great.
So there it is, our living room. After I get the settee finished, I can finish decorating and show you more pictures. Thanks for coming by!

Monday, November 1, 2010

My Quilt for Quilt Festival


I'm joining the Quilt Festival Fall 2010 over at Amy's Creative Side.

I'm entering the quilt I finished last spring, for my niece Aria. It's one of my favorite quilts because it's really my first real quilt I had made. I did a lot of hand stitching on it, so it took a lot of work and I loved how it turned out. I experimented with doing hand stitching, machine stitching, and machine stitching on the binding, which I found to be quite a bit easier. On this quilt I used Moda's Layer Cake fabric Sultry by Basic Grey and I love the colors.


I hand stitched every other square with four hearts.


Wednesday, October 27, 2010

Reversible Apron

It's that time of the year...bazaar season. I really thought I wouldn't do anything this year, but after I got my craft room organized, I got the bug. So here is an apron I whipped up, it's reversible. You can wear it front ways or back ways, or back ways or front ways, there is no front or back. You can tie the bow in back or the front. There you go! I hope someone will like it at Connie's bazaar, if not here is a peek at my sisters' Christmas gift.

(Photography above by my 4 yr. old, thanks Preston)

Here are some more, fronts and backs. I used Mary Engelbreit's The Caroler fabric.


If you want one for yourself or would like to make some for Christmas gifts, I'm working on putting together a tutorial. Think of all the cute fabrics out there you could use!
Tutorial Coming Soon...

Wednesday, October 13, 2010

Finally.......Home!!!

We are finally in our new home, or at least new to us. We bought a short sale house that was not a short wait, but worth it in the end. This house was smaller than what we were looking for, but had many things we liked, especially location, location, location. But now that we have moved in, I just LOVE it, it's a great layout and feels like the perfect size after all.


We still have boxes to unpack and some organizing to do, but here is a little glimpse of some of my favorite things about this house. First, a little front porch to display my flowers and keep an eye on the kids.
An apple tree, with "the best apples ever", said the previous owners. Apple pies, apple sauce, yum, yum yum!!!


Windows and Light! I love a lot of natural light and this house feels bright, which was very important to me, especially here in the Pacific NW.

A kitchen with cabinets galore, a pantry, and an island. I'm loving it, but I see white cabinets in the future.

A nice white mantle around the gas fireplace.

A room to sew and craft in. I'm not finished yet but I did put up IKEA wall shelves.

An upstairs laundry room. My least favorite chore is laundry, but so far an upstairs laundry room seems to make this never ending chore easier.


Okay, now the real reason we bought this house. The master bathroom has it's own toilet room with a fan and a window that opens...double bonus!!!

Thursday, September 16, 2010

New Fabric in My Shop

I'm sooooo excited, look what's new in my fabric shop, Fabrically Delicious. Here is a peek at some of the new lines of fabric in the shop. You have to admit these are beautiful, fun, and delicious fabrics. Go check them out!!! Also, be sure to check out the fabric on sale too.

Bliss by Bonnie and Camille

Dream On by Urban Chiks


Fandango by Kate Spain

It's a Hoot by MoMo

Thursday, August 5, 2010

Easy Car Cozy Tutorial

These are a great gift idea for a little boy who loves playing with cars. Tuck it in your purse and when the little guy is bored waiting for a doctor appointment or whatever pull out this handy car holder with a built-in road. They are easy to make, so I will try my best to give good directions on how to make one.

You will need: 2 black felt sheets 9" x 12", small piece of black felt (for wheel), small piece of white felt (for window), color of your choice felt (for car), yellow grosgrain ribbon, button (for wheel), black and yellow thread.

1. Cut your felt: Cut both black felt lengthwise 3" from top. You will have (2) 3" x 12" pieces and (2) 6" x 12" pieces. Cut ribbon: (2) 12 1/2 ", and (1) 13 1/2 ".
2. Sew your 12 1/2 " ribbon onto the edge of one of your 3" pieces lengthwise (see picture). Sew right down the middle of ribbon. Repeat underneath with a small gap between the top ribbon.
3. Sew 13 1/2" ribbon onto a 6" felt piece, just above 3", sew down the middle of ribbon about halfway down the felt. Loop the ribbon and sew (for hooking on the button to close cozy)
4. Sew your car holder pockets, by putting the two ribbon piece onto the 6" felt piece WITHOUT the ribbon. Divide into four pockets. Use a heavy duty stitching, so it's sturdy for the rough little guy.
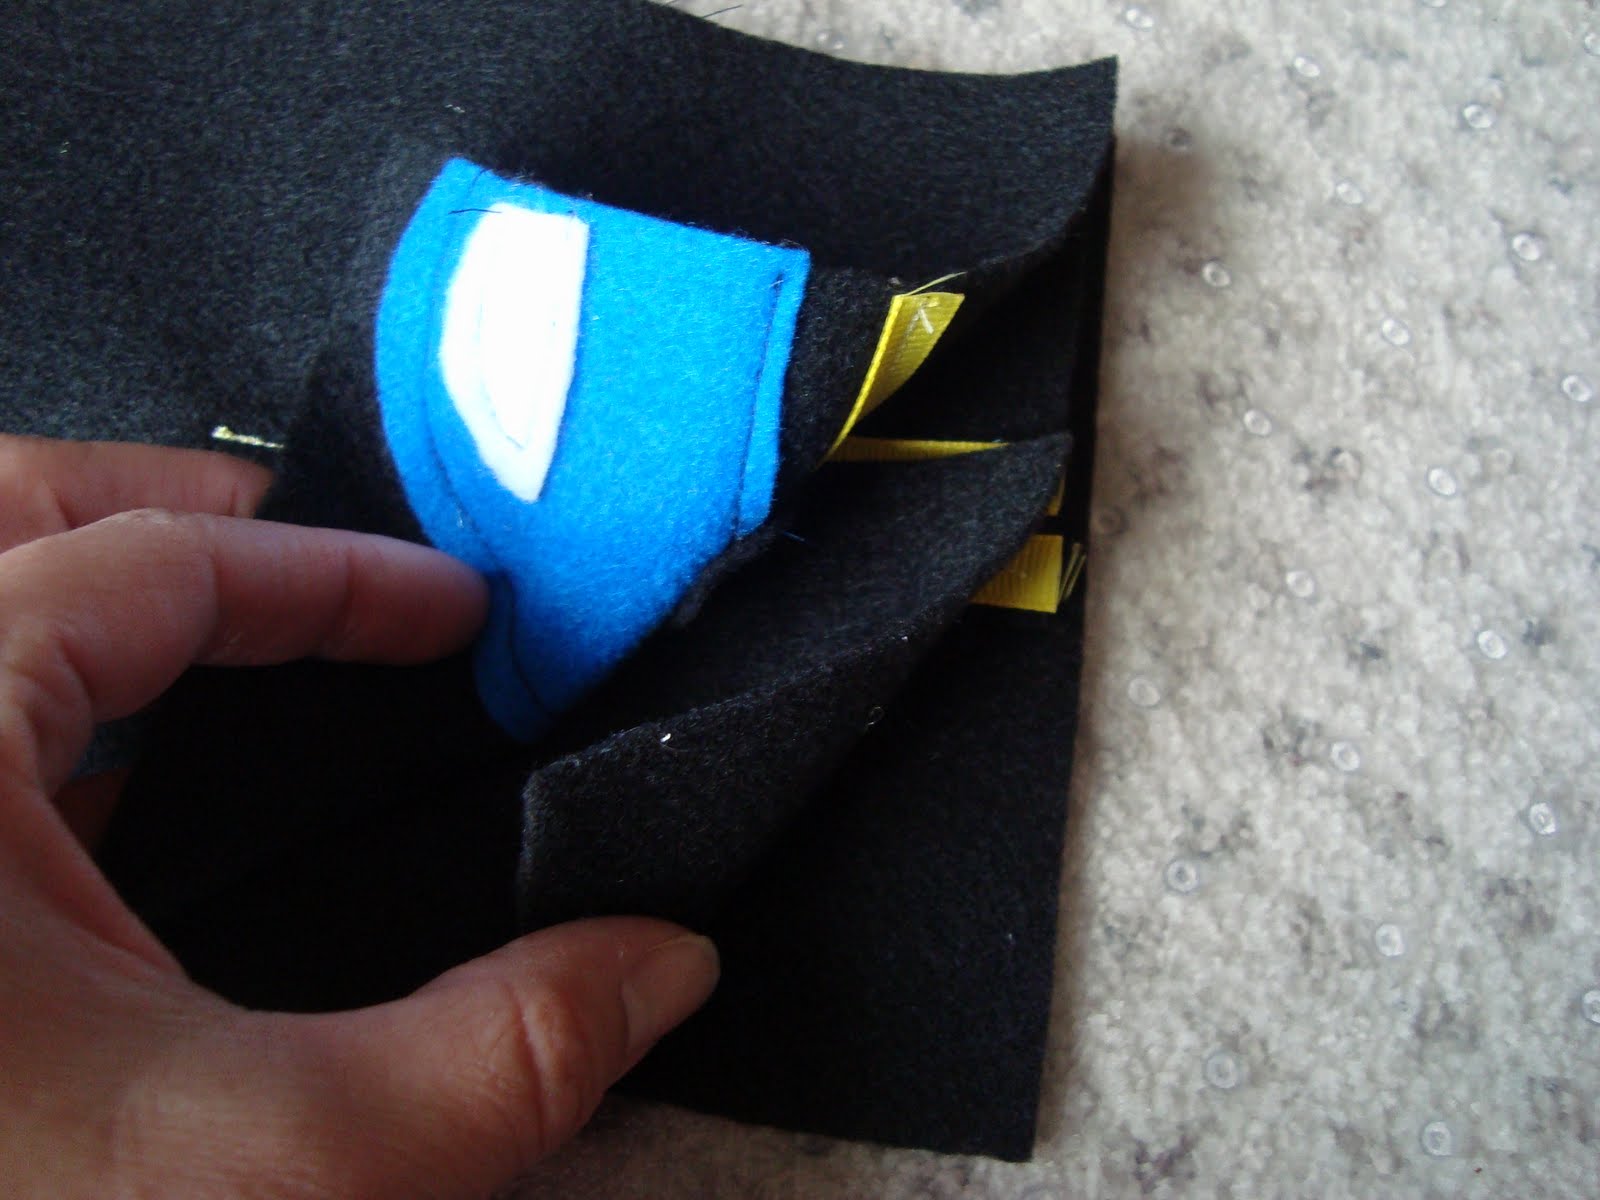
5. Take the 6" felt piece with the ribbon: sew on your car, window, wheel (overlap onto ribbon), and sew on the button. Find a car pattern to trace for your car or freehand one.

6. Sandwich your pieces together: Right sides facing in, sew the car pocket, 3" felt flap piece in the middle, and car piece with ribbon (see above picture). Sew just along the top attaching the flap piece.

7. Sew just above seam, on outside. Now sew around all four sides with about a 1/8" seam. Now use pinking shears and trim the edges.

8. Vrrrrrrrooooooooooooooooooooooooommm!!!!!!!!!!!!!!!!!!!